Ginger Croquembouche
May 16, 2016
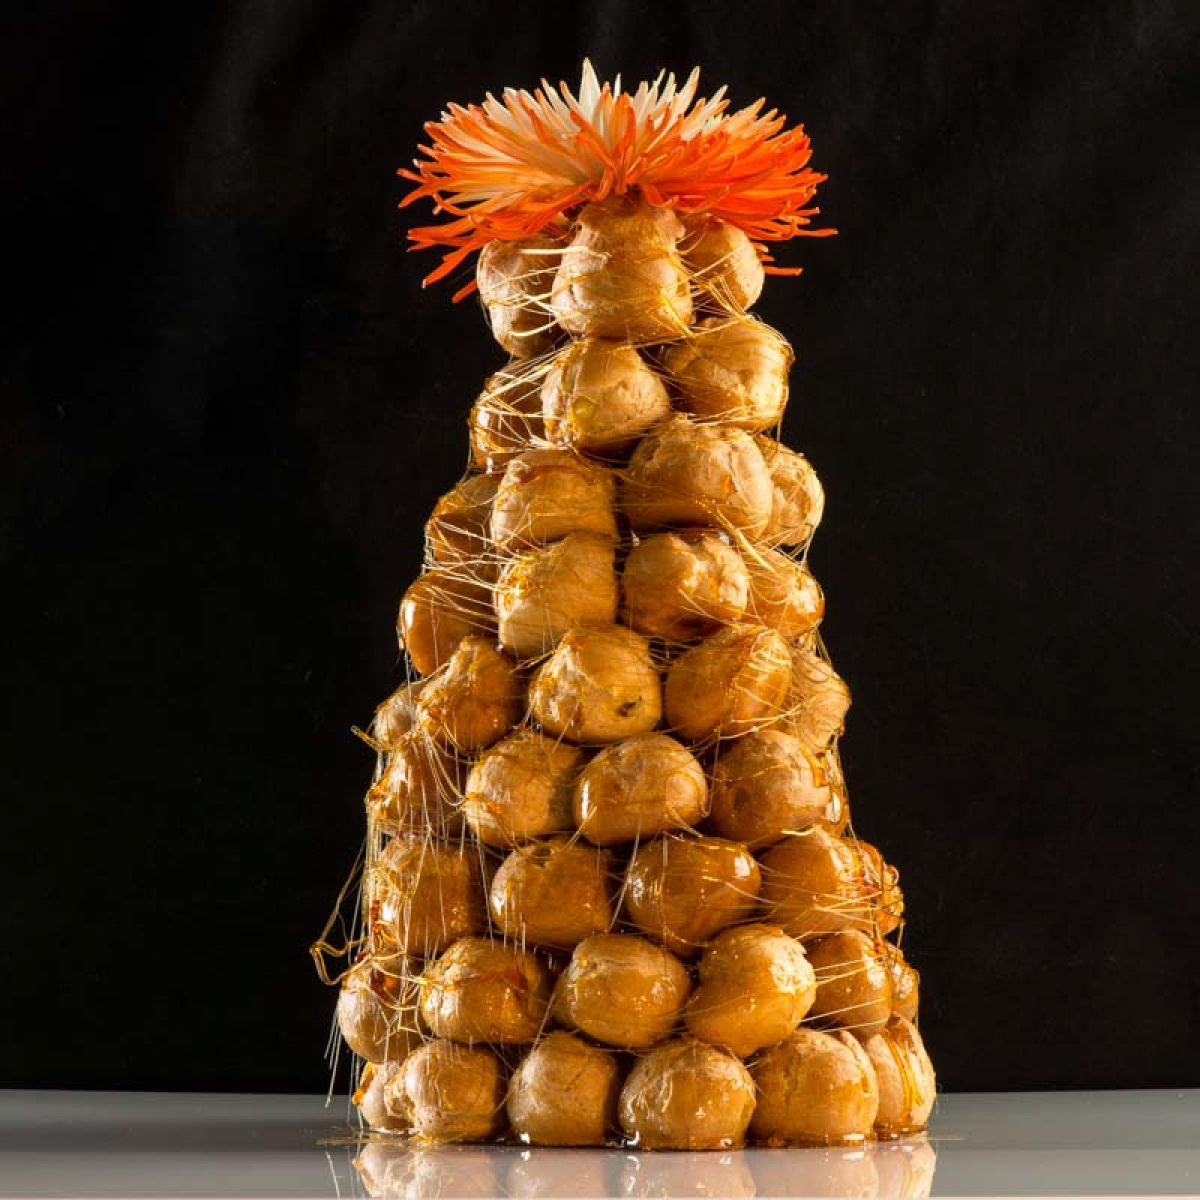
This Croquembouche with Ginger Juice Pastry Cream stood majestically on the birthday cake table. We sang Happy Birthday in a couple of languages, then the birthday girl broke off the first pâte-à-choux. I could see her enthusiasm. YEAH! The croquembouche was a towering success.
I flavoured the Croquembouche with spicy ginger juice because the birthday girl has low tolerance for sweetness. Baking for her, I’m challenged to enhance textures and flavours in place for sweetness. This Croquembouche, with its crunchy chouxs and silky cream filling, will stay in her memory for a long time.
Before launching into the details of this post, I’d like to acknowledge the expertise of Shirley Corriher and her book Bake Wise. I highly recommend it. The Pâte-à-Choux recipe is hers.
The Finer Cookie is a participant in the Amazon Services LLC Associates Program, an affiliate advertising program designed to provide a means for websites to earn advertising fees by advertising and linking to amazon.com. This post contains affiliate links, which means The Finer Cookie will receive a small commission if you make a purchase using this link. This modest income helps support the website.
Ingredients
Ingredients for Ginger Croquembouche
- 1 1 1 recipe of ginger juice
- 1 1 1 recipe of pâte-à-choux
- 1 1 1 recipe of pastry cream
- 1 1 1 recipe caramelized sugar
Ginger Juice Ingredients
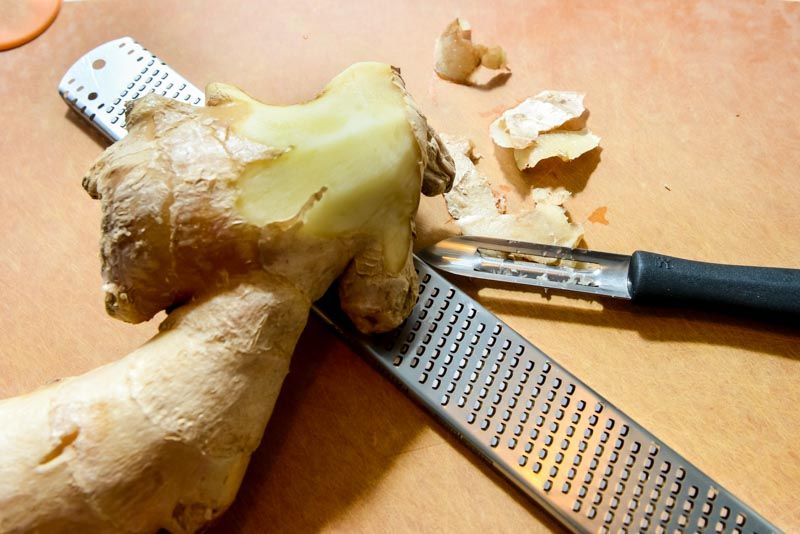
- 1 large piece, about 6 inches 226-340 grams 8-12 ounces fresh ginger-- one big hunk (the fresher the ginger, the more juice it will yield)
Ingredients For Choux Pastry
- 6 large 300 grams 10.50 (6 large)ounces eggs, in shells
- 1 cup 226 grams 8 ounces water
- 4 tablespoons 57 grams 2 ounces unsalted butter
- 1/2 teaspoon 3 grams 1/2 teaspoon salt
- 1/2 teaspoon 2 grams 1/2 teaspoon sugar
- 1/4 teaspoon 1/4 teaspoon 1/4 teaspoon vanilla extract
- 1 cup 162 grams 5.7 ounces bread flour (see note on bread flour)
- 1 large 1 large 1 large egg beaten, for glaze, optional
Ingredients For The Pastry Cream
- 6 84 grams (6) 3 ounces egg yolks
- 1/2 cup 98 grams 3.5 ounces granulated white sugar
- 2 2 2 pinches fine salt
- 1/2 cup 56 grams 2 ounces cornstarch
- 2 cups 454 grams 16 ounces whole milk
- 1/4 cup 1/4 cup 1/4 cup ginger juice, divided (recipe above)
- 1/4 teaspoon 1/4 teaspoon 1/4 teaspoon white pepper (this will brighten up the flavors)
Ingredients For The Sugar Syrup
- 4 cups 792 grams 28 ounces white sugar
- 1 cup 1 cup 8 ounces water
- 1/8 teaspoon 1/8 teaspoon 1/8 teaspoon cream of tartar
Instructions
MAKING THE GINGER JUICE
- Cut a 12″ square of double-layer cheesecloth.
- Peel the ginger and grate it directly onto the piece of cheesecloth.
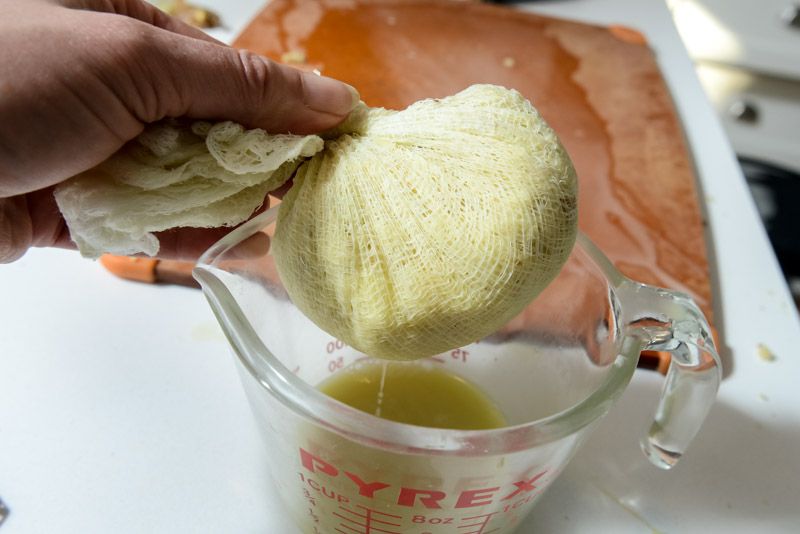
- Gather up the four corners of the cheesecloth and twist it tight so that it’s oozing ginger juice.
- Squeeze as much juice as possible into a glass container.
- Set aside.
MISE EN PLACE FOR THE CHOUX PASTRY
- Preheat the oven to 450ºF/232ºC with a shelf on the lower third of the oven. Set a baking stone on the shelf.
- On the floor of the oven set a baking tray, cast iron pan lined in foil (to prevent rust), or set some other heat resistant container on the floor of the oven. This will be necessary to create steam when the choux’s are baking.
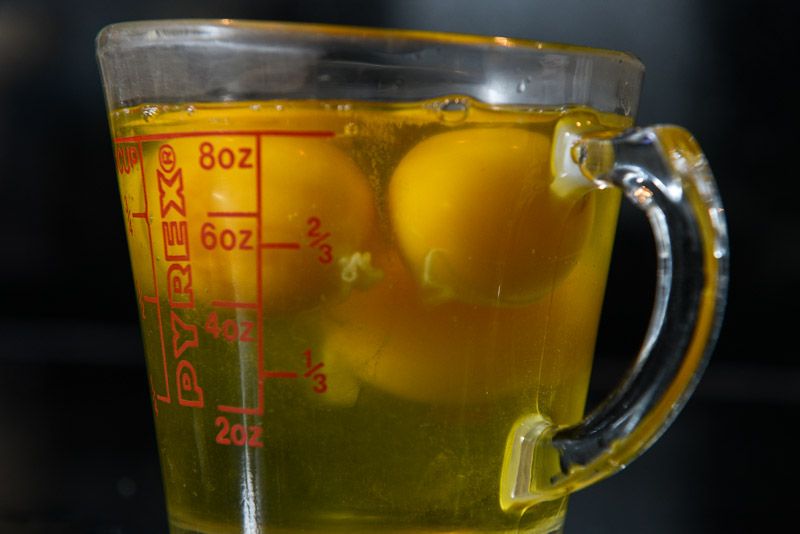
- Place the six eggs in their shell in a bowl covered with hot tap water. Let the water cool and repeat. The idea is to warm the eggs.
- Separate 2 of the eggs and store the egg yolks for the pastry cream. Place the 2 egg whites in a liquid measuring cup.
- Add the vanilla and sugar to the eggs.
- Add the remaining 4 whole eggs into the same measuring cup. Cover in plastic (to avoid evaporation) and set aside.
- Crack another egg into a smaller bowl for the glaze on the choux pasteries (optional). Cover with plastic wrap (to avoid evaporation).
- Ready a pastry brush. Set aside.
- Weigh the butter, water, and salt in a medium saucepan and set aside. Click here to read The Finer Cookie’s post on how to weigh and measure.
- Weigh the bread flour into a separate bowl and and set aside.
- Prepare the baking sheet with a silicone mat, or parchment.
- Get out a heavy wooden spoon and a dough whisk. Set them aside too.
- Insert a 1/4″ round piping tip into the pastry bag. To make it easier and less messy to fill, set the empty bag in a tall glass and open the bag over the rim of the glass. This will keep the outside of the bag cleaner.
- Set up the stand mixer with a paddle attachment.
ASSEMBLE THE CHOUX PASTRY
- Turn on the heat and bring the water, butter and salt to a full boil.
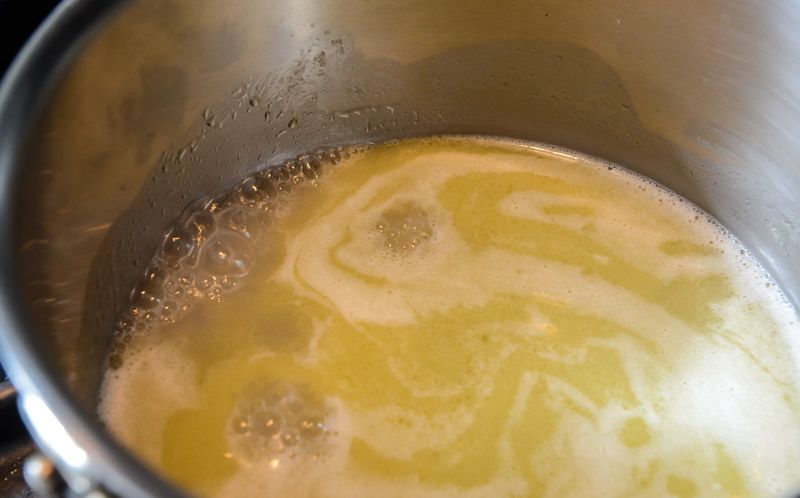
- Once it is boiling, remove it from the heat and add the flour all at once. This is important because you’ll want the flour to absorb the liquid evenly.
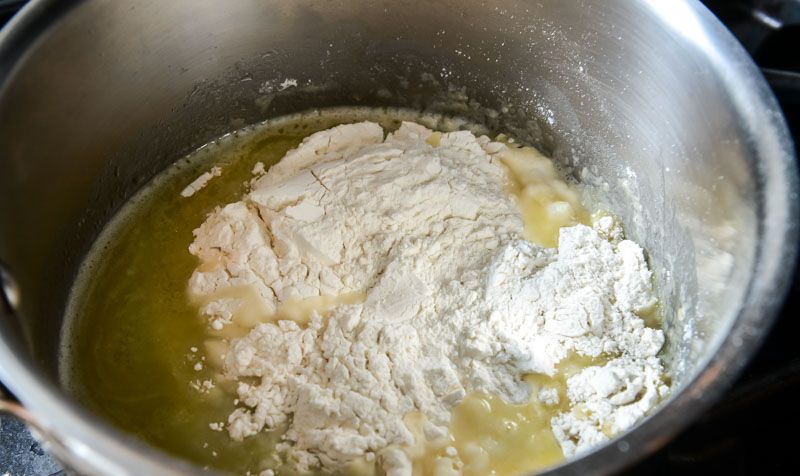
- Stir vigorously with the dough whisk until the mass comes together.
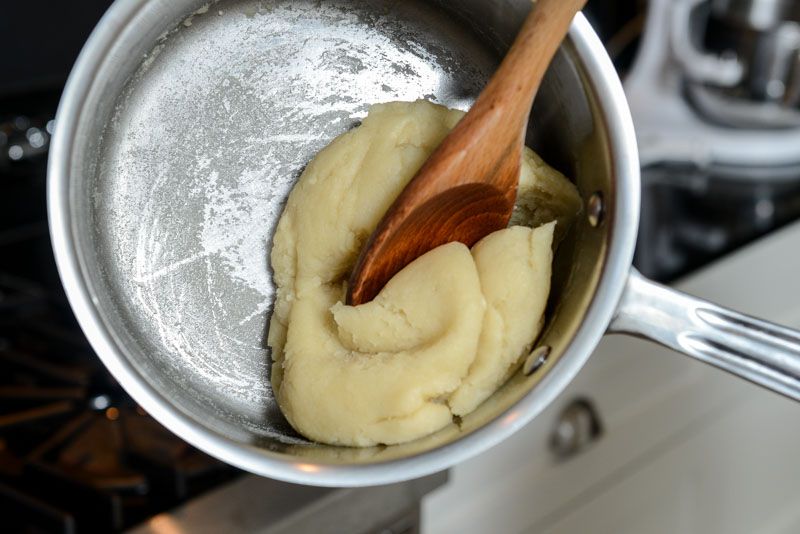
- Return the pan to medium heat and stir the dough with a wooden spoon until a film begins to develop on the bottom of the pan, and steam starts to rise from the dough. (see above Note on Bread Flour for further instruction).
IMPORTANT TO YOUR SUCCESS
- The goal during cooking is to create a very dry dough by releasing as much water/steam as possible. The dryer the dough, the more egg it will accept/absorb without losing its thick consistency. The more egg that’s incorporated, the more puff and rise you’ll get during baking.
- Continue stirring over the heat for about 3-5 minutes. A hand held mixer comes in handy at this stage because it will help release steam and save your shoulder. Avoid browning the dough.
- Transfer the warm dough to the bowl of the stand mixer fitted with the paddle attachment and turn the mixer to the stir setting. You will see big clouds of steam rise from the mixing bowl. This is good. Let the mixer run for a minute or two more to release as much moisture as possible.
- Gather the dough against the side of the bowl.
- Add about ¼ cup of warm egg to the dough and mix gently until incorporated.
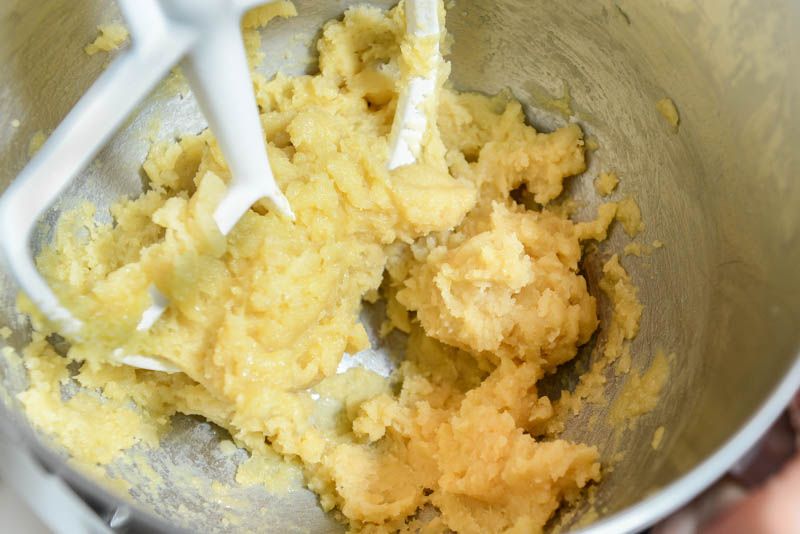
- Once the egg is incorporated, add another ¼ cup of warm egg.
- If you’ve dried the dough thoroughly, it should be able to absorb the entire cup of eggs.
- Pipe the warm choux batter immediately as they achieve the best puff when baking warm batter.
- ALSO: If you see little flour seeds in the batter, beat the batter on medium speed for another minute or two. It should smooth out at this point
FORM THE PÂTE-À-CHOUX
- Spoon the batter into an 18″ pastry bag with a 1/2 inch tip. Push the batter toward the tip and twist the bag closed.
- Applying even pressure, pipe small round blobs of dough about 1/2 to 3/4 inches in diameter and tall. If the dough is the proper consistency, the choux will hold their shape and not spread.

- Pipe 4 across and 6 down giving you 24 choux per tray.
- With a damp finger to prevent sticking, very lightly smooth out the tips of the choux
- OPTIONAL: Very gently, dab the choux with egg being careful not to let it drip onto the tray as it will prevent them from rising fully
BAKING THE CHOUX PASTRY
- For the best rise, bake one tray at a time only with heat from the bottom elements. The crust will set too quickly with the top element on, preventing the maximum rise. Just so you know, I’ve baked two trays at a time with reasonable success, not maximum success.
- Once the oven is at 450ºF/232ºC, fill a dry cup measure with ice cubes. While wearing oven mitts, slide the tray onto the bottom shelf of the oven and very quickly pour the ice cubes into the hot pan sitting on the oven floor, then shut the door as quickly as possible. The steam from the melting ice cubes will create a moist environment and will give you the best rise possible.
- Turn the heat down to 425ºF/218ºC (from 450ºF/232ºF) and bake for about 20-25 minutes. If you’re baking two trays at the same time, rotate the pans.
- Turn down the oven again to 350ºF/177ºC and bake for another 10 minutes or so to give them time to dry out and brown nicely.
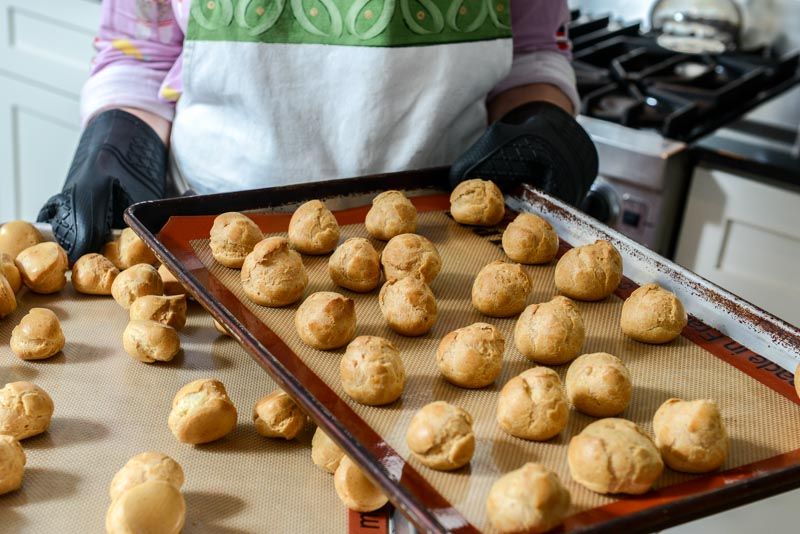
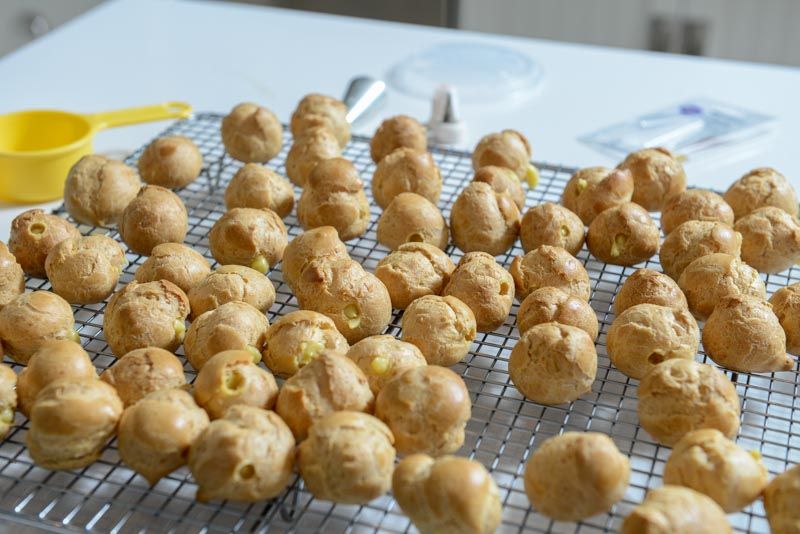
COOLING THE CHOUX
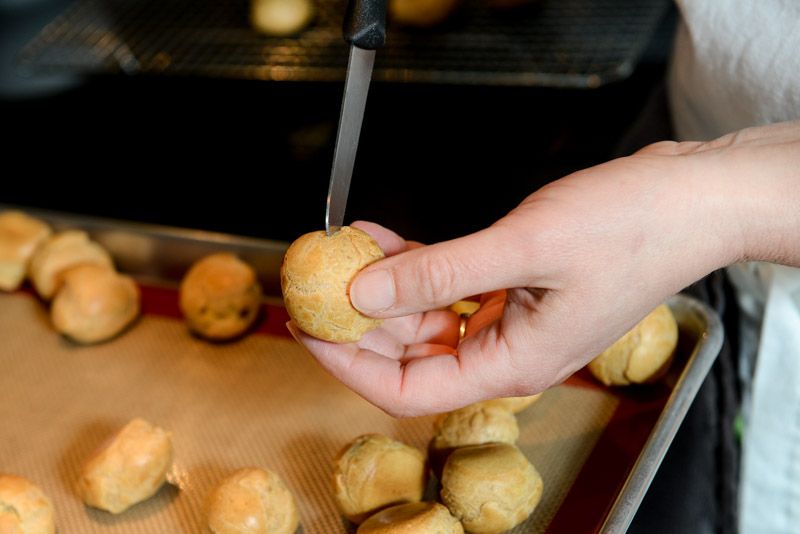
- Cut a small slit in each choux to release the steam and set them on a rack to cool completely.
- They can be used right away or frozen for up to two months, or stored in a plastic bag or container in the short term. If while in the bag, they soften, let them dry in the open air.
MISE EN PLACE FOR THE PASTRY CREAM
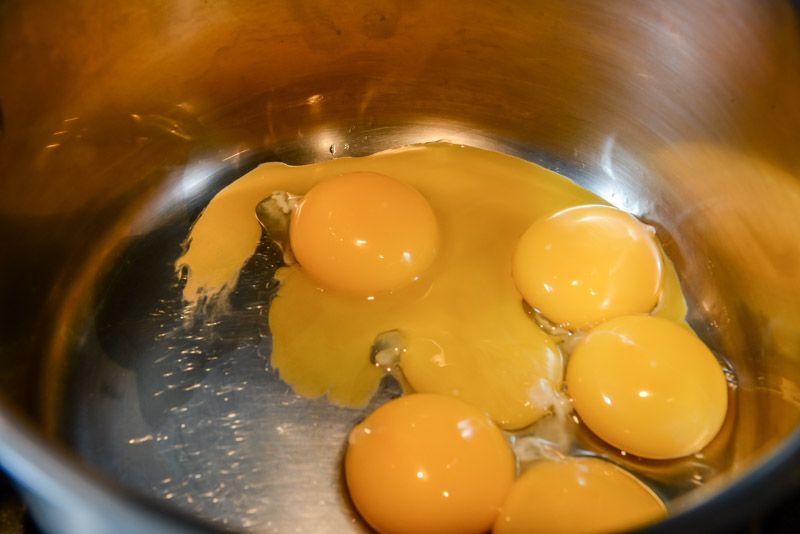
- Separate the eggs and place the egg yolks in a wide mouth heavy saucepan. See How to Separate Eggs for easy technique.
- Measure the sugar and salt in a small bowl and set a side.
- Weigh or measure the cornstarch in a separate bowl.
- Combine 1 cup of milk and 2 tbsps of ginger juice, then add more milk to make 2 complete 2 cups. Heat for 1 minute in the microwave.
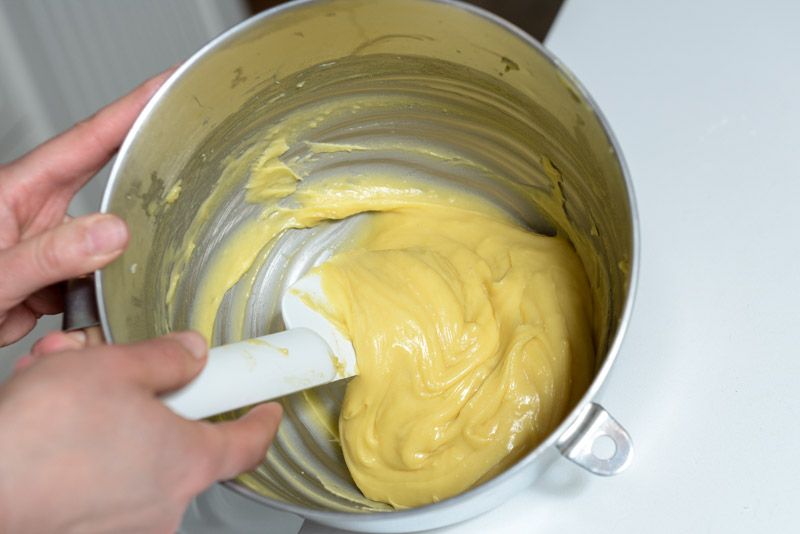
ASSEMBLING THE PASTRY CREAM
- Whisk the egg yolks, sugar, and salt in the cold saucepan until light in color.
- Sift the cornstarch onto the egg/sugar mixture.
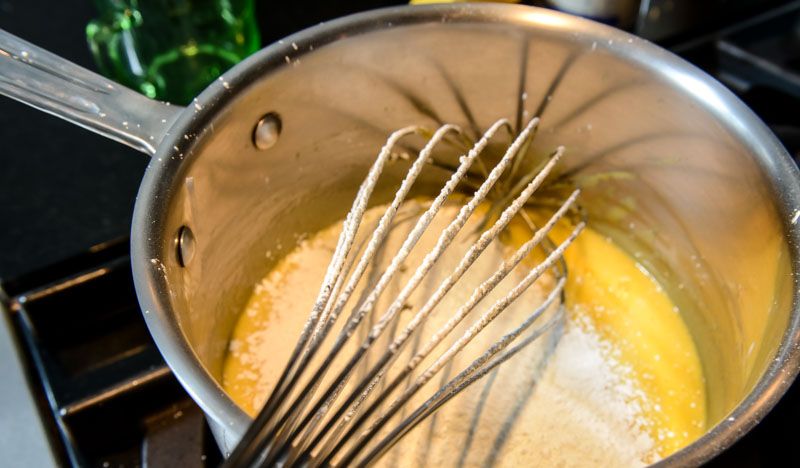
- Whisk them together until very smooth.
- Slowly pour the milk/ginger mixture and whisk to combine.
- Set the saucepan over medium heat and change to a rubber spatula.
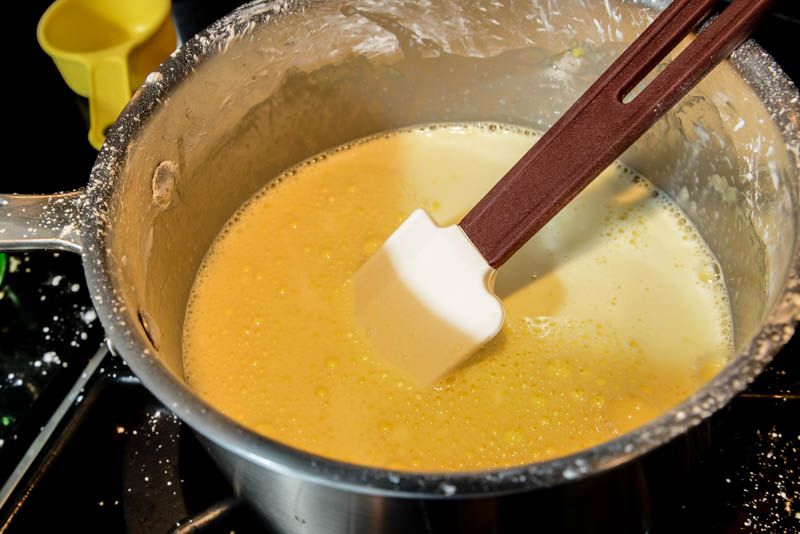
- Stir constantly until the pastry cream begins to warm up. The cornstarch is heavy and will want to sink and collect at the bottom of the pan. Stirring will keep the cornstarch suspended as it activates and thickens the liquid. If you begin to feel a thick layer forming, switch back to the whisk and whip vigorously until the cream emulsifies. This is important to keep the pastry cream smooth.
- Once the pastry cream thickens, add the remaining 2 tbsp of ginger juice and the white pepper, and stir to incorporate.
- Let the pastry cream cool without stirring further.
FILLING THE CHOUX PASTRY
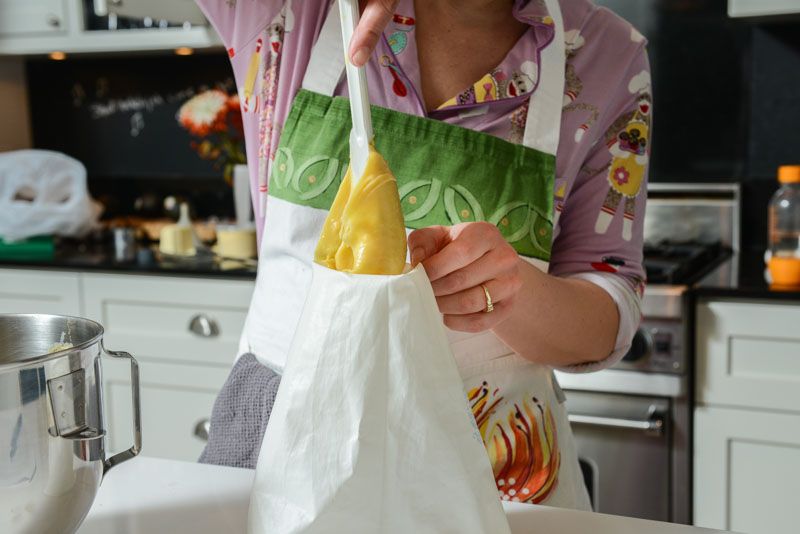
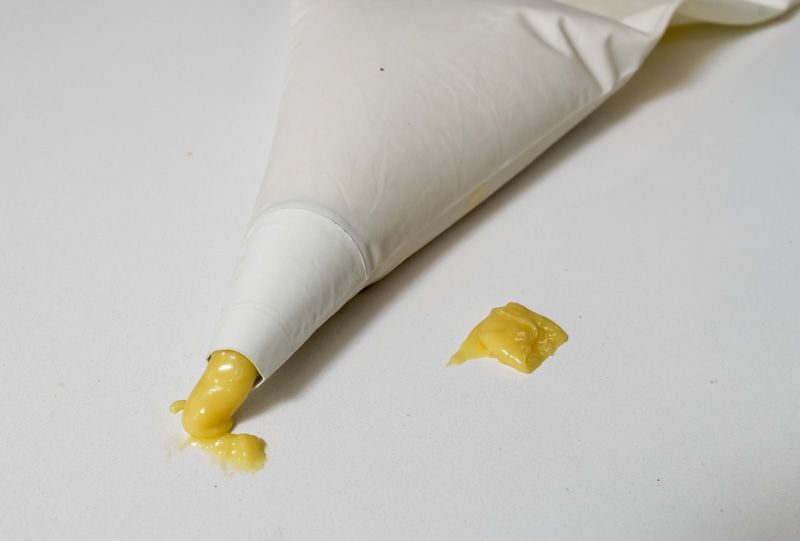
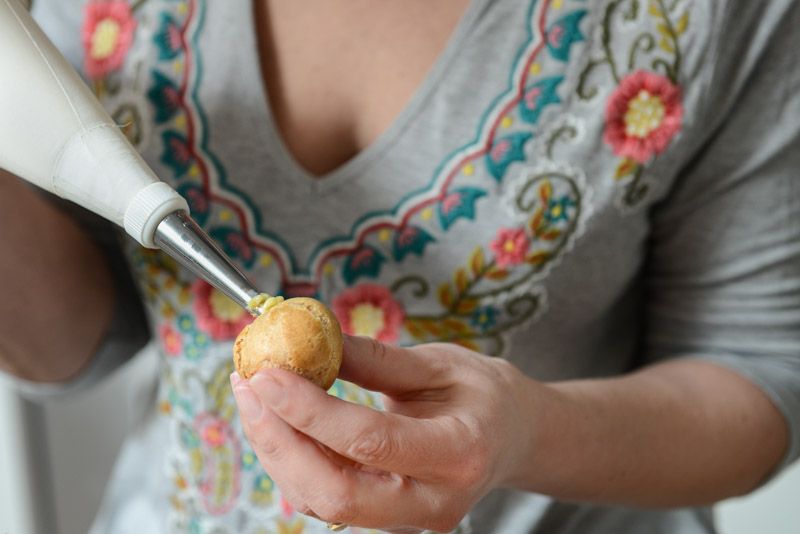
- For this, you’ll need a large pastry bag fitted with a Boquilla Filling Tip and screwed down with a coupler. The coupler is very important because you’ll need leverage to push the tip into the choux. If the tip isn’t secured well with a coupler, the tip will push back into the bag and you’ll never get the tip into the choux and then you’ll curse.
- With your pastry bag filled and tight with pastry cream, poke the filling tip into the choux and squeeze the bag to fill the pastry. You will feel the choux becoming heavy. Fill them to about 2/3 full.
ASSEMBLING THE CROQUEMBOUCHE
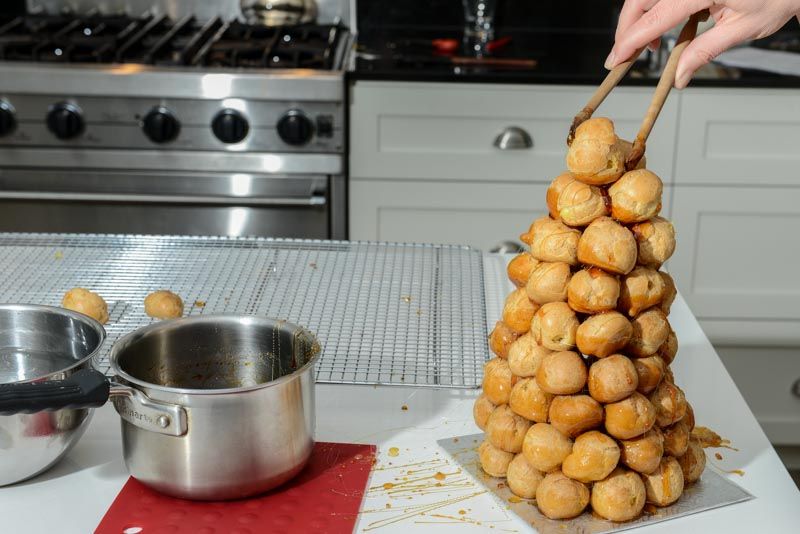
- Now that you have all your choux filled with the ginger pastry cream, you’re ready to build the croquembouche. This step is actually quite simple once you get started. If there is any advice I could give you at this point is to trust your sugar. By that I mean, cooked sugar acts like cement when it cools and is super stable.
- There are some recipes that will tell you to completely submerge the choux in the hot sugar, but honestly, this is unnecessary for two reasons: 1) the croquembouche becomes too heavy, and the bottom choux are likely to crush under the weight, and 2) when the hot sugar is too thick, it often becomes sticky when it cools and this isn’t what you want. The goal here is for the caramelized sugar to lend a crackly texture to the crispy choux pastry. With the silky pastry cream, the textures are sublime. So here we go.
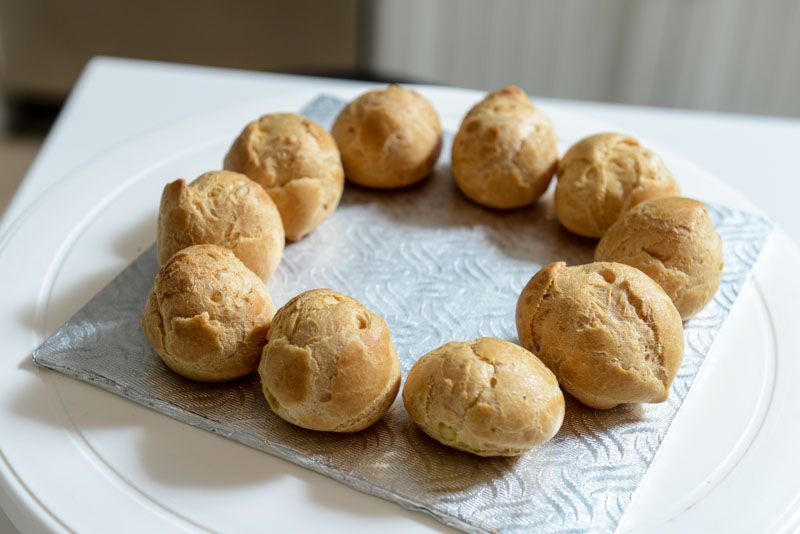
- Ready a very stiff 8″ cardboard cake square or round and set it on your workspace. Choose 10 choux and make a 7″ circle with them so that they are all touching.
CARAMELIZED SUGAR SYRUP
- This caramelized sugar syrup recipe is the most crackly, crispy caramel that I know. The cream of tartar makes all the difference. This recipe will be enough syrup for the entire croquembouche.
COOKING THE SUGAR
- Combine the sugar, water and cream of tarter in a small saucepan.
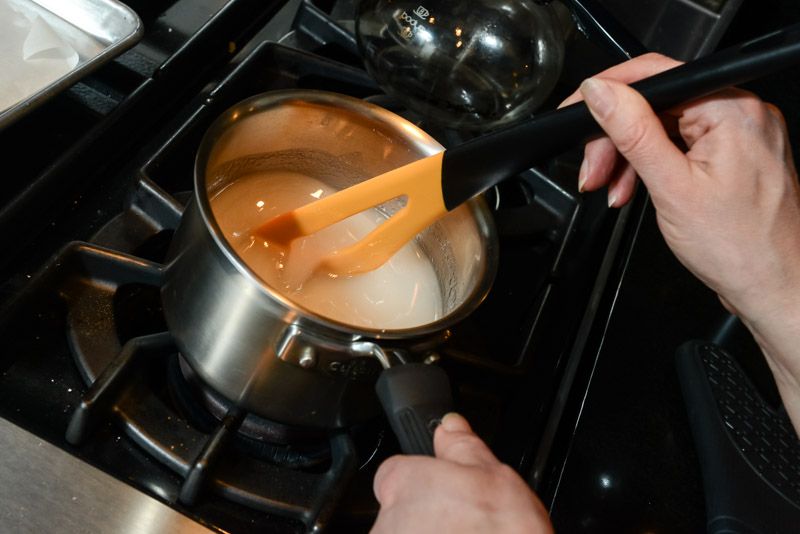
- Turn on the heat to medium and stir until the sugar dissolves.
- Stop stirring and let the temperature rise slowly.
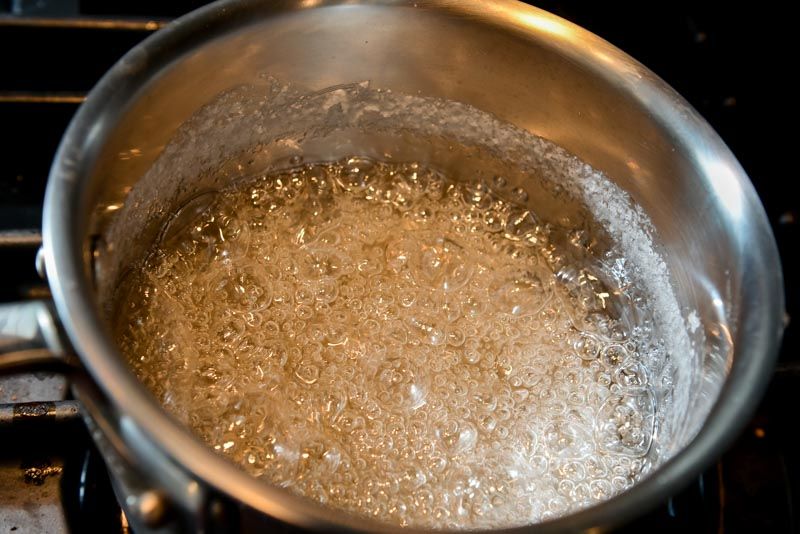
- Use a candy thermometer and test the temperature.
- Continue boiling without stirring until the temperature reaches 360ºF
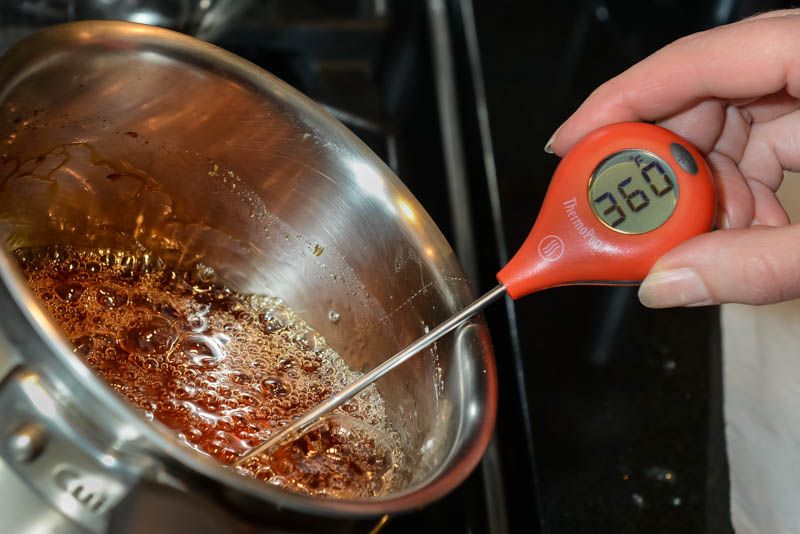
- Remove the pan from the heat just before it hits 360ºF because the sugar will continue to cook.
DIPPING THE CHOUX IN THE HOT SUGAR
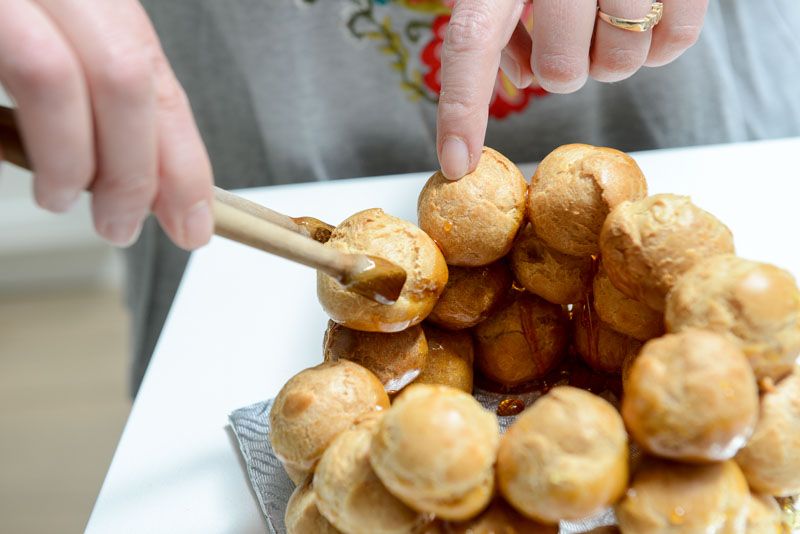
- Starting with the 10 choux you chose to be your bases, dip each choux, about halfway, one at a time in the caramelized sugar, being very careful not to burn yourself.

- Set each sugared choux onto the cardboard and let the sugar set before you dip the next one.
- Once all 10 choux are dipped and put in place, take another and repeat, using the hot sugar as glue. Set each choux slightly on the inside of the pyramid as you go.
- After placing each choux, hold it with your finger until the sugar sets. Then take the next and repeat until all the choux are dipped and placed to form your croquembouche.
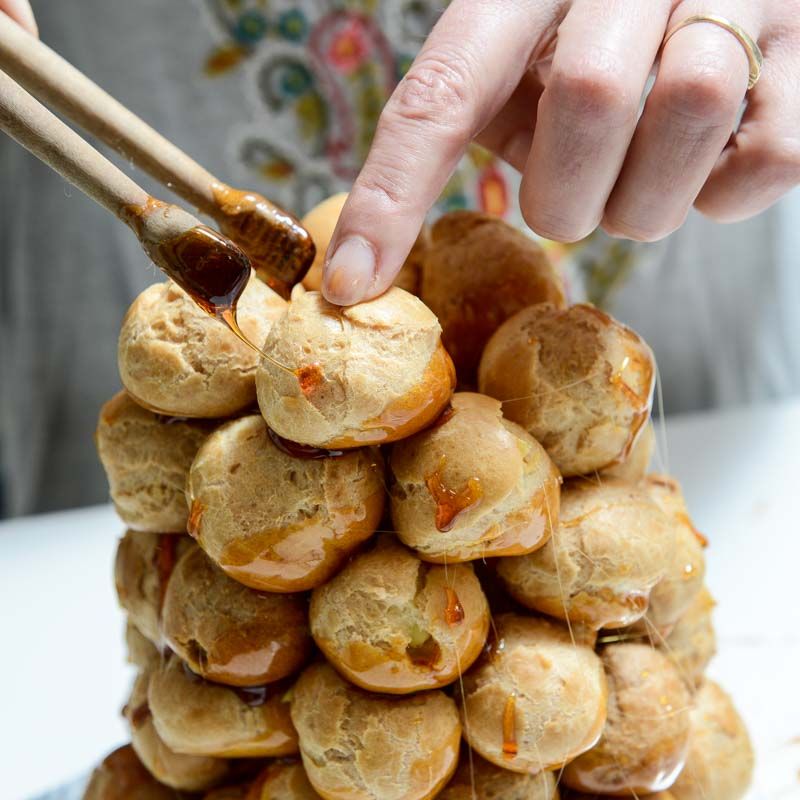
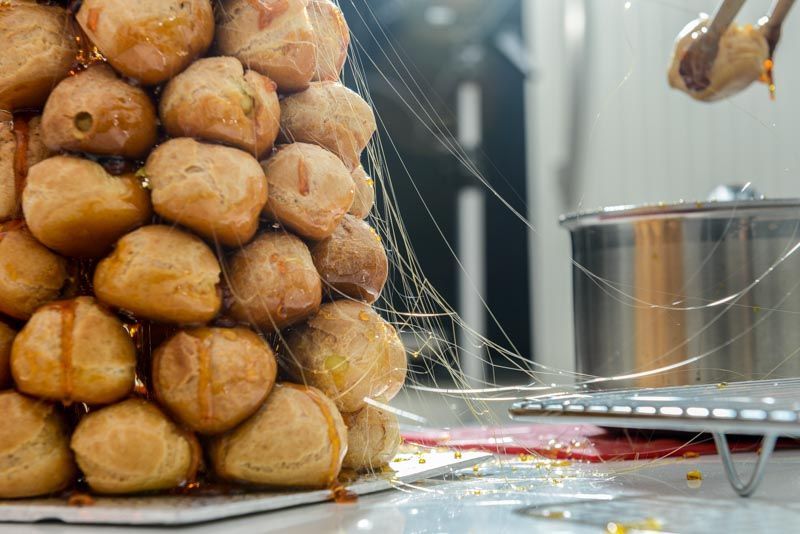
MAKING THE DELICATE SUGAR THREADS
- As you work to build your croquembouche, the sugar will continue to darken. At this point, the syrup cools instantly on contact with air. You can use this to your advantage by creating gossamer threads.
- With an old whisk that you’ve cut the tips off or a ball whisk with stainless steal tips, dip the tips into the hot sugar and lift straight up. Let the hot sugar drip off the whisk and when the consistency looks right, begin to wind the gossamer threads around the Croquembouche.
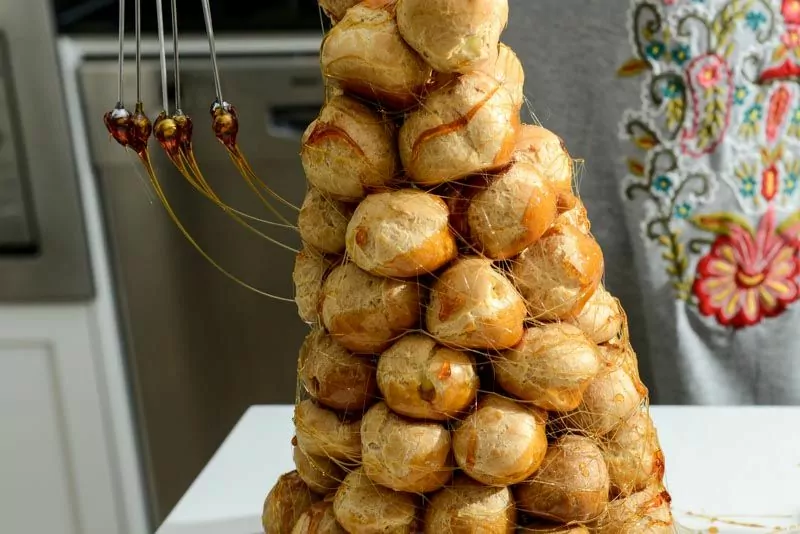
- Continue for as long as the sugar permits or for as long as you like.
- Let the pâte-à-choux cool on a rack.
PLATING THE CROQUEMBOUCHE
- As the sugar cools, it will get harder and crispier. It is possible to remove from the cardboard round so that you can plate the Croquembouche on a serving dish.
- Using a large offset spatula, find a point of entry whereby your spatula will gently slide underneath the Croquembouche. The sugar will snap off the cardboard.
- Don’t force anything. Just take your time, easing the underneath loose where ever possible.
- At some point, the croquembouche will completely lift off the cardboard. Gripping it firmly at the bottom, gently transfer it to a serving dish.
- After all this, don’t forget to enjoy it and leave me a comment about what you thought.
NOTE ON THE BREAD FLOUR
I know using bread flour for Choux Pastry is unconventional; however, it produces a very crisp, dry shell. It’s better because the bread flour has a higher protein count and absorbs more liquid than all-purpose flour. The dough will be stiffer and more difficult to stir by hand. That’s why I pull out my trusty hand mixer to help me. Simply turn on the hand mixer to its lowest setting for about 1 minute, then stir again with your wooden spoon. The dough will melt together into a single mass. Magic. If bread flour is unavailable, use all-purpose flour and do an extra good job drying out the dough so it’s able to absorb all the egg.
NOTE ON USING A STAND MIXER VERSUS A FOOD PROCESSOR
Some people prefer using a food processor to incorporate the egg. I don’t think an FP incorporates the egg as well as the stand mixer or a handheld mixer. I feel the mixer produces the lighter, puffier choux pastry.
IMPORTANT NOTE ON THE FINAL CONSISTENCY OF THE CHOUX BATTER
The final consistency of the batter should be thick enough to hold their shape when spooned or piped into small blobs/balls. As you add the egg, assess the thickness of the batter. The batter must be visibly thick. If it was thick one moment then runny the next DON’T PANIC. Let the batter sit for 10-15 minutes, during which time the bread flour will absorb the liquid, and you’ll find it a better consistency.
NOTE ON THE THICKNESS OF THE PASTRY CREAM
The goal is to have a flavourful cream that is thick enough to hold its shape when spooned or piped. Be sure to add all of the flavoring into the warm pastry cream. As the cream cools, the cornstarch especially becomes thicker. Stirring it after will break the bonds and cause the cream to loosen.
NOTE ON FILLING THE CHOUXS
You shouldn’t fill the pastries to 100% capacity because the cream will gush out through the entry point and/or creating a mess when building your croquembouche. Also eating an over filled choux creates problems too. Filling them completely will make them heavy and could crush the bottom chouxs once your cone is built. Just be aware.
- Labels
- Low Sugar,
- Savoury